
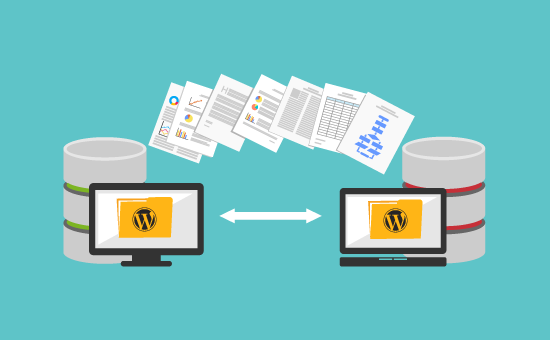
A business website is one of the most important digital assets a company owns. As a business grows, however, its website may need to move to a better hosting provider, a new domain, a different server, or even a redesigned WordPress installation.
This process is known as website migration.
WordPress migration may sound simple, but moving a website incorrectly can result in broken pages, missing images, database errors, lost emails, broken links, downtime, or even a significant drop in search engine rankings.
A successful migration requires careful planning, backups, testing, redirects, and post-migration monitoring.
Whether you are moving from shared hosting to a VPS, changing your domain name, switching hosting providers, or rebuilding your WordPress website, understanding the migration process can help you avoid common problems.
In this guide, we explain how to migrate a WordPress website safely and what businesses should check before, during, and after migration.
What Is WordPress Website Migration?
WordPress website migration is the process of moving a WordPress website from one environment to another.
This could involve moving:
- One hosting provider to another
- One server to another
- One domain to another
- One WordPress installation to another
- A development website to a live server
- A staging website to production
- An old website to a redesigned website
A migration usually involves transferring both the website files and the database.
However, a complete migration is more than simply copying files.
You may also need to configure:
- Domain DNS
- SSL certificates
- Database connections
- PHP settings
- Email services
- WordPress URLs
- Permalinks
- Redirects
- Caching
- Security settings
- Third-party integrations
Why Do Businesses Migrate WordPress Websites?
There are several reasons why a business may decide to migrate its website.
1. Poor Hosting Performance
A website may become slow or unreliable because of limited hosting resources.
Businesses may migrate to a better hosting environment when they experience:
- Slow server response
- Frequent downtime
- Resource limitations
- Database performance issues
- High traffic
- Poor support
Moving to a better server can provide more resources and greater flexibility.
2. Changing Hosting Providers
Businesses sometimes change hosting companies because of pricing, support, performance, or technical requirements.
For example, a website may move from shared hosting to:
- Cloud hosting
- VPS hosting
- Managed WordPress hosting
- Dedicated servers
3. Domain Name Change
A company may rebrand and move from an old domain to a new domain.
This type of migration requires special attention because search engines need to understand that the website has permanently moved.
4. Website Redesign
A business may rebuild its website using:
- A new WordPress theme
- Elementor
- Gutenberg
- Custom WordPress development
- WooCommerce
- A new information architecture
The new website may be developed on a staging server and later migrated to production.
Step 1: Plan the Migration
Before moving anything, create a migration plan.
Identify:
- Current hosting provider
- New hosting provider
- Current domain
- New domain, if applicable
- WordPress version
- PHP version
- Database type
- Active plugins
- Active theme
- Email configuration
- SSL configuration
- DNS provider
- Third-party integrations
Make a list of everything that needs to work after migration.
This simple checklist can prevent important components from being forgotten.
Step 2: Create a Complete Backup
Never migrate a WordPress website without having a reliable backup.
A proper backup should include:
WordPress Files
This includes:
- Themes
- Plugins
- Uploads
- WordPress core files
- Custom files
- Configuration files
Database
The database contains important information such as:
- Pages
- Posts
- Users
- Orders
- Product information
- Settings
- Plugin data
- WooCommerce information
For an e-commerce website, the database is especially important because customer and order information may be stored there.
Ideally, keep the backup in a separate location rather than only on the existing server.
Step 3: Prepare the New Server
Before transferring the website, configure the new hosting environment.
Check:
- PHP version
- MySQL/MariaDB version
- Memory limits
- Maximum upload size
- PHP execution time
- SSL availability
- Server permissions
- Database access
- Required PHP extensions
The new environment should be compatible with the existing WordPress website.
For example, if the old server uses a particular PHP version and a plugin is incompatible with a newer version, upgrading PHP during migration could cause unexpected errors.
Therefore, major changes should ideally be tested separately.
Step 4: Transfer WordPress Files
The next step is transferring website files to the new server.
Depending on the hosting environment, developers can use methods such as:
- FTP
- SFTP
- SSH
- Hosting migration tools
- Backup restoration
- Server-to-server transfer
The wp-content directory is particularly important because it contains themes, plugins, uploads, and other website-specific resources.
Make sure files are transferred completely and maintain the correct directory structure.
Step 5: Import the Database
After transferring the files, create a database on the new server.
You generally need:
- Database name
- Database username
- Database password
- Database host
Then import the existing WordPress database.
For larger databases, traditional browser-based phpMyAdmin imports may hit upload or execution limits.
In such cases, alternative methods may include:
- Command-line database import
- Hosting migration tools
- Database management utilities
- Specialized migration plugins
The best method depends on the hosting environment and database size.
Step 6: Update wp-config.php
WordPress needs the correct database credentials to connect to the database.
The configuration file contains database-related settings that must match the new server.
If these credentials are incorrect, WordPress may display database connection errors.
Developers should also check other configuration values, especially when the old hosting environment used custom settings.
Step 7: Check Website URLs
When moving to a new domain, WordPress URLs need to be updated.
For example, a website may move from:
old-domain.com
to:
new-domain.com
The old domain should not simply be replaced blindly throughout the database.
Serialized data and plugin-specific information can make manual database replacement risky.
A proper migration method should safely handle URL replacement.
Step 8: Test the Website Before Changing DNS
One of the best migration practices is to test the website on the new server before sending visitors there.
Developers can use temporary access methods or local host configuration to preview the website.
Check:
- Homepage
- About page
- Contact page
- Blog
- Forms
- Login
- Registration
- Search
- Images
- Menus
- Internal links
- WooCommerce
- Checkout
- Payment gateway
- Customer accounts
Testing before DNS changes allows developers to identify problems while the original website is still live.
Step 9: Check WordPress Plugins
Plugins can behave differently on a new server.
After migration, check important plugins individually.
Pay particular attention to:
- Caching plugins
- Security plugins
- SEO plugins
- Form plugins
- WooCommerce
- Payment gateways
- SMTP plugins
- Backup plugins
- Membership plugins
- API integrations
If a plugin requires server-specific configuration, update its settings accordingly.
Step 10: Test Forms and Emails
A website can appear completely functional while contact forms silently fail.
After migration, test:
- Contact forms
- Quote forms
- Registration emails
- Password reset emails
- Order emails
- Admin notifications
- SMTP configuration
If the website sends business-critical emails, consider using a reliable SMTP or transactional email service.
Step 11: Check SSL and HTTPS
SSL is essential for modern websites.
After migration, confirm that:
- HTTPS works
- HTTP redirects to HTTPS
- Images load through HTTPS
- CSS loads through HTTPS
- JavaScript loads through HTTPS
- No mixed-content warnings appear
If the website uses a CDN or proxy service, its SSL configuration should also be checked.
Step 12: Update DNS
Once the new website has been thoroughly tested, update DNS records to point the domain toward the new server.
Depending on the DNS setup, this may involve changing:
- A records
- AAAA records
- CNAME records
- Nameservers
DNS changes do not always become visible everywhere immediately.
Therefore, businesses should plan migration timing carefully.
Step 13: Protect SEO During Migration
SEO is one of the most important parts of website migration.
A technically successful migration can still damage organic traffic if URLs are changed without proper planning.
Before migration, create a list of important URLs.
After migration, verify:
- Page URLs
- Meta titles
- Meta descriptions
- Canonical URLs
- XML sitemap
- Robots.txt
- Internal links
- Structured data
- Indexability
If URLs have changed, implement appropriate 301 redirects from old URLs to their corresponding new URLs.
For example:
old-domain.com/old-service/
should redirect to the relevant new URL rather than sending visitors to the homepage.
Why 301 Redirects Matter
A 301 redirect communicates that a page has permanently moved.
This helps users and search engines reach the new location.
Without proper redirects, visitors may encounter:
404 Not Found
pages.
Search engines may also struggle to understand the relationship between old and new URLs.
A redirect map should ideally be prepared before the migration begins.
Step 14: Check Google Search Console
After migration, monitor the website through Google Search Console.
Check for:
- Indexing issues
- Coverage problems
- Crawl errors
- Redirect problems
- Mobile usability issues
- Sitemap status
- Security issues
If the domain itself has changed, make sure the appropriate search engine migration procedures are followed.
Step 15: Monitor the Website After Migration
Migration does not end when DNS changes.
The first few days after migration are extremely important.
Monitor:
- Website uptime
- Server errors
- 404 pages
- Traffic
- Rankings
- Conversion rates
- Form submissions
- Email delivery
- Checkout
- Database performance
- Server resources
For larger websites, continue monitoring for several weeks.
Common WordPress Migration Mistakes
Migrating Without a Backup
This is one of the biggest mistakes.
Always maintain a recoverable backup before making major changes.
Forgetting the Database
Copying only WordPress files is not enough.
The database contains much of the website’s actual content and configuration.
Changing Too Many Things at Once
Avoid combining migration with unnecessary upgrades unless they have been tested.
For example, changing hosting, PHP version, WordPress version, theme, and major plugins simultaneously can make troubleshooting much harder.
Forgetting Redirects
Changing URLs without redirects can result in broken links and SEO problems.
Not Testing Forms
A contact form may appear visually correct but fail to send emails.
Always submit real test messages.
Ignoring Mobile Testing
A website that works on desktop may still have problems on smartphones.
Check responsive layouts after migration.
Forgetting Cron Jobs
Some WordPress websites rely on scheduled tasks.
After moving servers, verify that scheduled processes continue to run correctly.
WordPress Migration Checklist
Before declaring a migration complete, verify:
- Website files transferred
- Database imported
- Database credentials updated
- WordPress loads correctly
- Admin login works
- Images load correctly
- Plugins work
- Theme works
- Forms work
- Emails work
- SSL works
- HTTPS redirects work
- Internal links work
- 404 errors checked
- Redirects implemented
- Sitemap checked
- Robots.txt checked
- Search Console monitored
- Analytics working
- WooCommerce tested
- Payment gateway tested
- Backups configured
Should You Migrate Your WordPress Website Yourself?
Simple WordPress websites can sometimes be migrated by experienced website owners.
However, professional assistance can be valuable when the website contains:
- Large databases
- WooCommerce orders
- Customer accounts
- Custom plugins
- API integrations
- Multiple domains
- High traffic
- Complex redirects
- Business-critical functionality
A poorly executed migration can cause downtime or data loss.
For an important business website, professional migration can reduce the risk of unexpected problems.
Final Thoughts
WordPress migration is more than copying files from one server to another.
A successful migration requires planning, backups, server configuration, database management, testing, DNS configuration, SEO protection, and post-migration monitoring.
Whether you are changing hosting providers, moving to a faster server, changing domains, or launching a redesigned WordPress website, every step should be carefully planned.
At Mag Cloud Solutions, we help businesses with WordPress development, website migration, redesign, WooCommerce development, server setup, troubleshooting, and ongoing website maintenance.
If you are planning to move your WordPress website to a new hosting provider or server and want to minimize downtime and technical issues, contact Mag Cloud Solutions.
📞 +91 9536899899
📧 sales@magcloudsolutions.com
A successful migration should make your website better—not create a new set of problems.